How To Make Raised Garden Bed Table
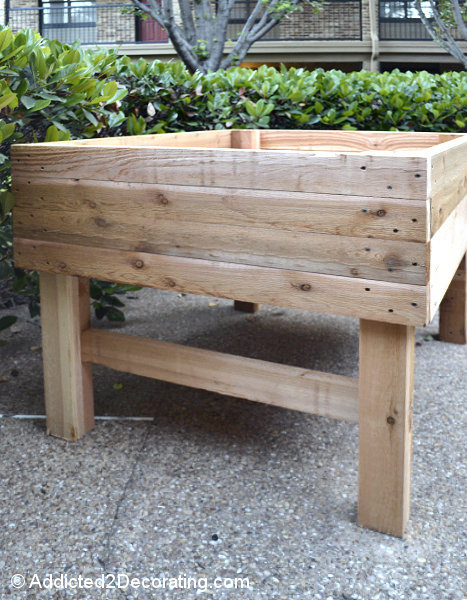
Good morning, all! I hope you had a fantastic weekend! The weather here was absolutely gorgeous, so I took the opportunity to work on a project outside–building an elevated garden table. These table gardens can be made to any size, and are perfect for people who live in apartments or condos, or who people who have a tiny back yard with no space for an in-ground garden.
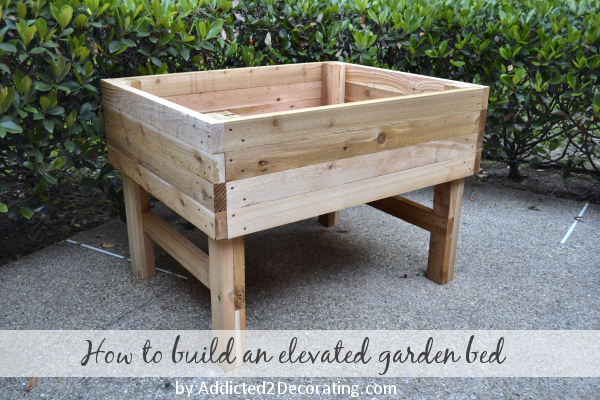
I know this doesn't really have anything to do with decorating, but Matt and I are so excited about being able to have fresh organic veggies growing right outside our door, and I know that many of you could use something like this, too! And really, I do think these elevated gardens look really nice, and would make a great addition to a patio, a deck, or any outdoor "room".
So let me show you how to build an elevated raised bed garden table!
Tools & Supplies
- 20 – 2″ x 4″ x 8′ cedar boards;
- 1 – 1″ x 2″ x 8′ cedar board;
- 2 1/2″ screws for exterior use (these will be used for most of the project);
- 2″ screws for exterior use (these will be used only for attaching the support pieces for the planting bed bottom);
- Miter saw or chop saw;
- Drill with drill bits and screwdriver bits;
- Tape measure.
Instructions:
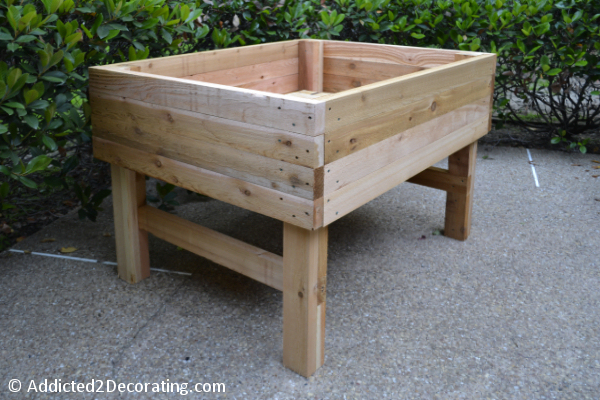
The outside measurements of this garden table are 4′ 4″ wide X 3′ 4″ deep x 36″ high. The planting bed measures 15″ high on the outside, with about 12″ of planting depth on the inside. If you'd like to make a different size, of course you'll need to adjust the measurements given below.
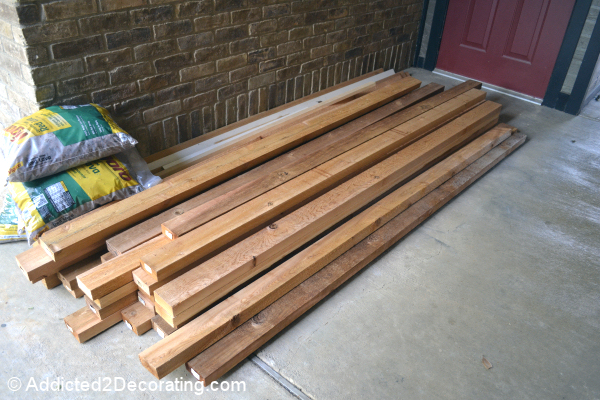
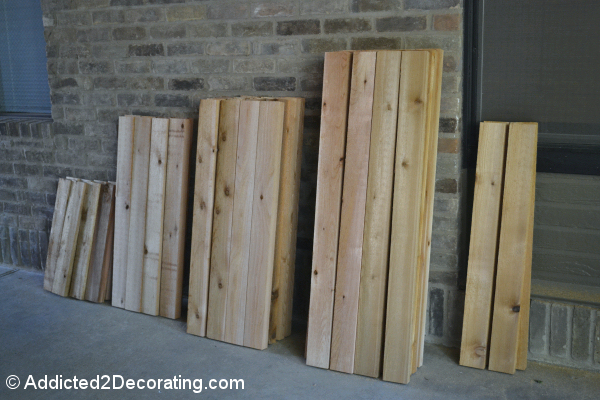
I started out by cutting most of my boards. I was making two tables, so for one table, you won't need this many. For one table, you'll need:
- For the long bed side boards – 8 pieces cut to 3 feet 11.75 inches (I wanted it to be as close to 4 feet as possible, but because the boards are never a full 8 feet long, I had to adjust a tiny bit);
- For the short bed side boards – 8 pieces cut to 3 feet 4 inches;
- For the long leg pieces – 4 pieces cut to 36 inches;
- For the top short leg pieces – 4 pieces cut to 23 inches;
- For the bottom short leg pieces – 4 pieces cut to 9.25 inches;
- For the leg support crossbars – 2 pieces cut to 36.75 inches.
Keep all of the boards separated so that you can find the right pieces easily!
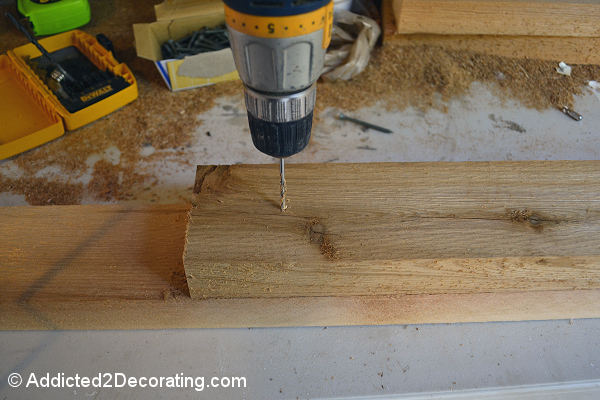
Start the construction with the legs. First, line up a long leg piece and a top short leg piece so that they're flush at one end and screw them together. Repeat this with the other three legs.
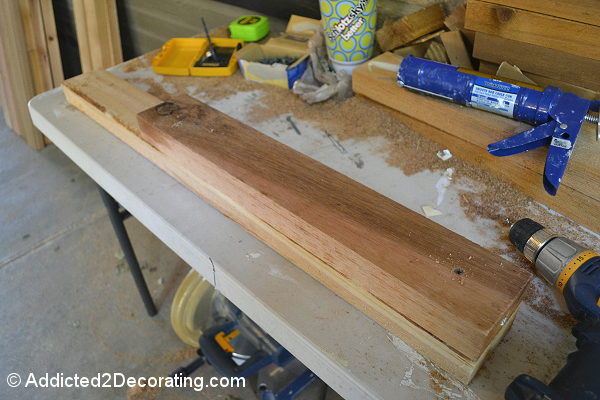
Be sure to pre-drill for the screws!! Cedar is very dry, and can split easily if you don't pre-drill.
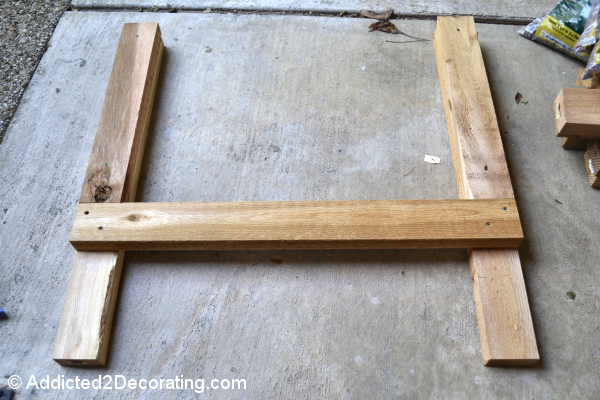
Next take two assembled legs and one leg support crossbar and position them as shown below. Screw each side together with two screws.
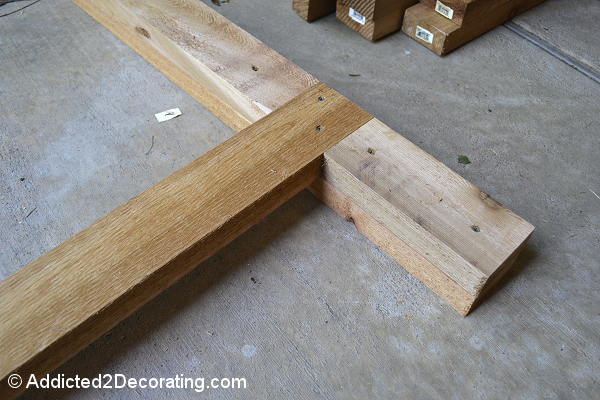
Now position the bottom short leg pieces just below the crossbar, and screw into place. Assemble the legs sections for the other side of the bed in the exact same way.
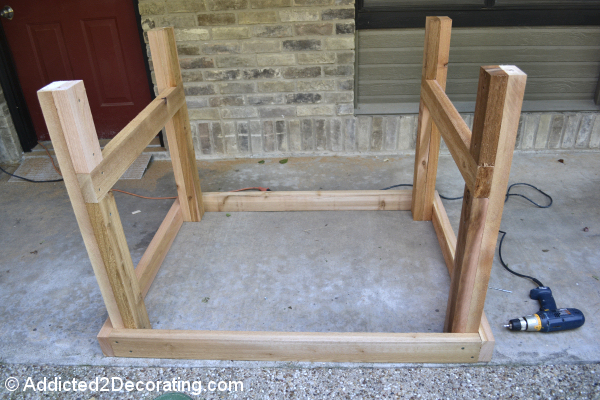
Now stand the leg sections so that the crossbar is closer to the top. Take one of the long bed side boards and position on the ground so that the ends are flush with the leg sections. Screw the board to the legs.
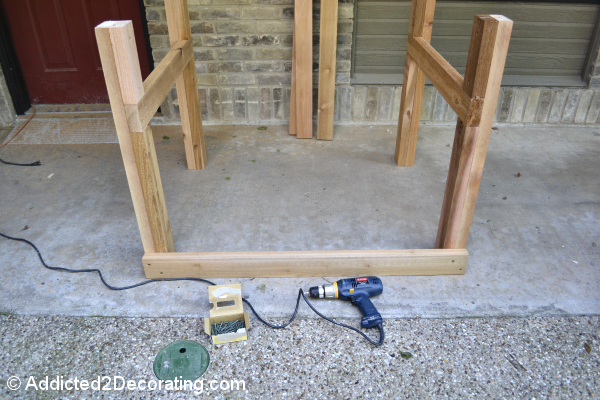
Repeat on the other long side, and then do the two short sides. At this point, it should look like this…
Now start building up the sides of the bed, working on the long sides first, and then short sides last. Each side uses four boards.
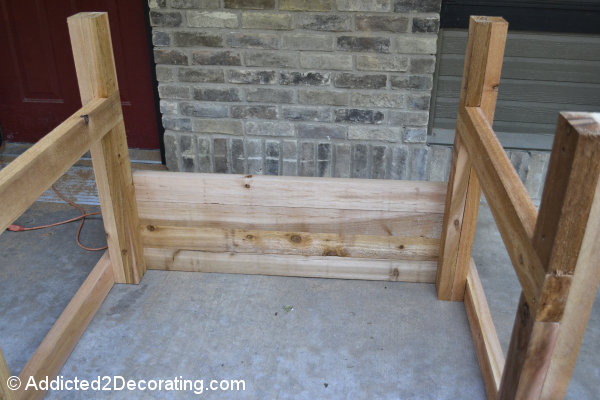
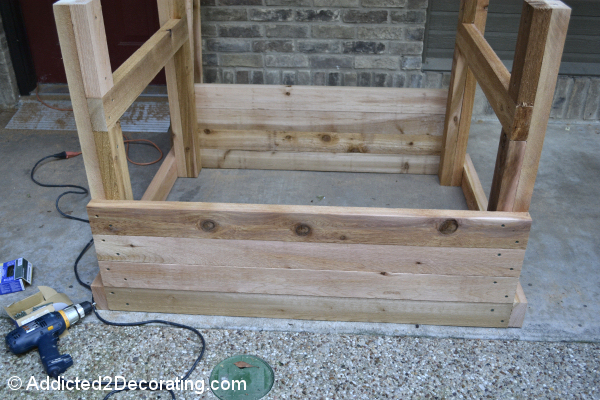
When you have four boards attached to each side, you can stand the bed upright.
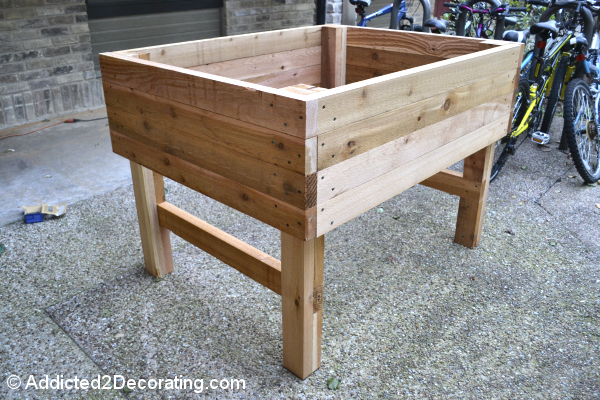
To create the support for the bottom, cut the 1″ x 2″ piece of cedar long enough to fit along the long side of the bed, and screw into place using 2-inch exterior screws on the bottom edge of the inside of the bed. Place the screws pretty close together (about 5 inches) for maximum support.
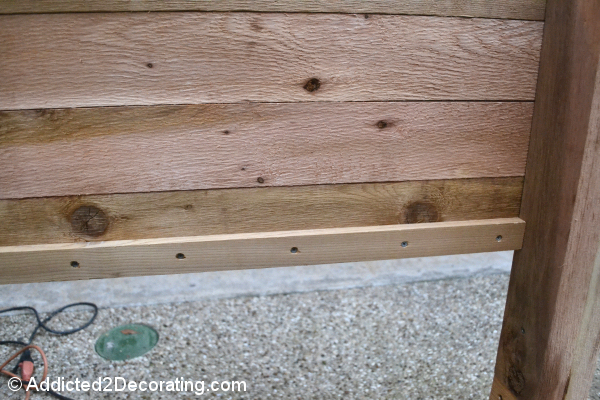
Also cut support pieces to position on the legs, and screw into place at a height that is even with the other long support piece.
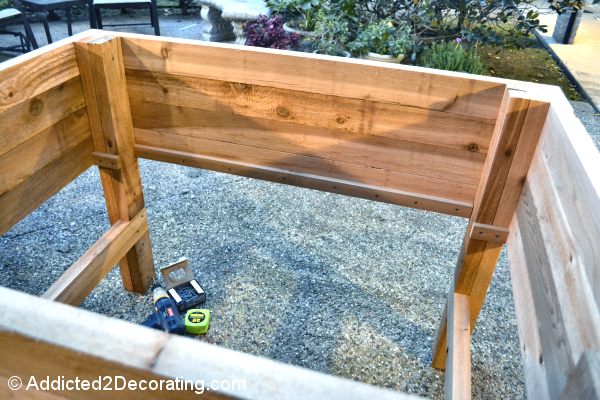
With the support pieces attached to both long sides of the bed (including the short supports on each of the legs), you can measure and cut the pieces for the bottom of the bed. There's no need to notch out any boards for the legs. There will be a small gap, but not enough to go to any extra trouble for notching boards.
With all of the boards cut and put into place, it should look something like this…
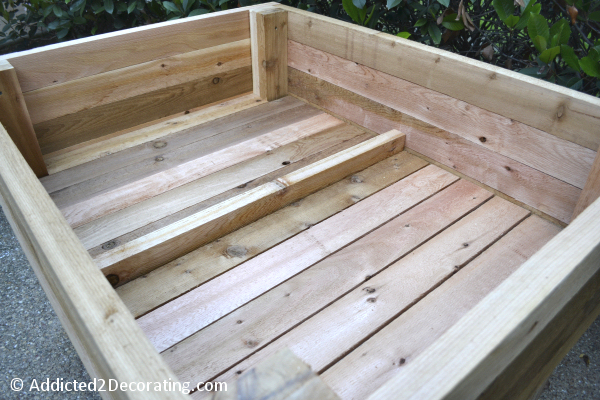
The board in the middle of the bed that is standing on its side is like that only because I didn't feel like ripping the board so that it would lie flat. I figured that nobody would know it's like that once the bed is filled with rocks, dirt, and plants. 😀
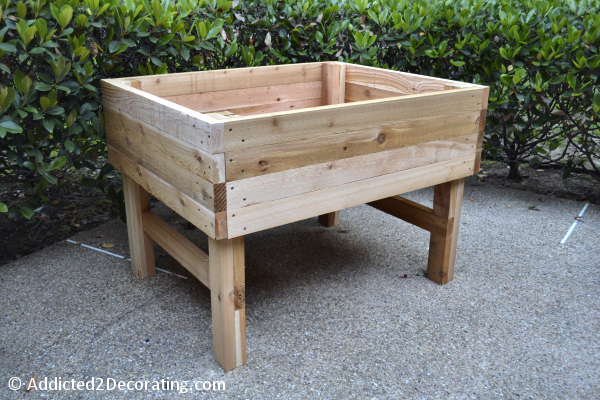
And there it is…an elevated garden bed ready to be filled!
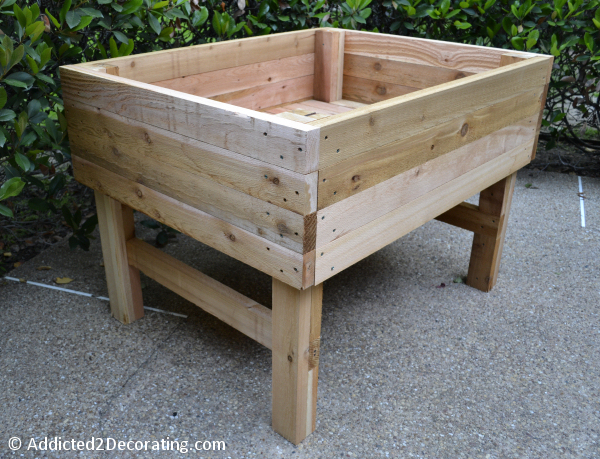
I'm so excited about getting our veggies planted!! It'll be so nice to be able to walk out our door and harvest fresh organic vegetables for our meals.
We're reading up on square foot gardening and planning out our garden. We hope to have lots of spinach, Romaine lettuce, kale, radishes, cilantro, celery, and lots of other goodies.
With two beds, we'll have about 24 square feet of planting space. Not too bad for condo living!

Addicted 2 Decorating is where I share my DIY and decorating journey as I remodel and decorate the 1948 fixer upper that my husband, Matt, and I bought in 2013. Matt has M.S. and is unable to do physical work, so I do the majority of the work on the house by myself. You can learn more about me here.
I hope you'll join me on my DIY and decorating journey! If you want to follow my projects and progress, you can subscribe below and have each new post delivered to your email inbox. That way you'll never miss a thing!
How To Make Raised Garden Bed Table
Source: https://www.addicted2decorating.com/how-to-build-an-elevated-garden.html
Posted by: allenmignobt.blogspot.com

0 Response to "How To Make Raised Garden Bed Table"
Post a Comment